
This is going to help you to earn more from your blog. In particular, if you are using
AdSense,
Media. net, or
another similar ad network, you are going to love learning about
Ezoic.
Imagine if you had a helpful friend who told you:Ads Placement.
Which displays sizes to use.
Which advertisers to work with to make the most money from your blog.That would have a direct impact on the amount of money you make from your blog, right?
For
example, what if you found out that
the way you’re currently displaying your ads
isn’t optimal?
If you changed to a
better way, you could
instantly make more money without needing to
increase your blog’s traffic.
That’s exactly what
Ezoic is trying to help with.
Ezoic lets you
test ad placements, sizes, and publishers to find the combination which makes you the most money.
Ezoic claims that most websites see a revenue increase of at
least 50% from implementing their optimization.
In fact, they’ve worked with over
20,000 websites.Those websites increased their revenue by an average of
115%!
Those are powerful numbers!
And while the focus of this review is on ad optimization,
Ezoic can also help you test your site’s layout and content, too.
 How To Set Up Ezoic For Increasing Ad Revenue:There are 5 steps that you need to follow:
- Create an account & link it to your blog using CloudFlare.
- Add the Ezoic script to your blog’s header.
- Convert all existing ad units to serve via Ezoic, and create new ad units.
- Apply for Google’s Ad Exchange program.
- Start using the Ezoic Ad Tester.So let’s get started with an epic tutorial that will help you to make more money from your blog: (In this guide, I will be setting up Ezoic on a WordPress site. If you are on another platform, the process will be the same except for WordPress specific things.)
 Note
Note: Sub-domains are not supported. So if you have a .blogspot domain name, ensure you get a custom domain name. If you are already on a self-hosted WordPress blog, you are good to go.
Once you are inside your dashboard for the first time, you need to start with these three steps:

The first step is to connect
Ezoic to your site.
Ezoic works with any platform as long as your website is on the root domain & not the sub-domain.
Click on
“Integrate Your Site” to get started.
The best (& fastest) way to integrate Ezoic to your site is by using
CloudFlare.

Login using your CloudFlare account:

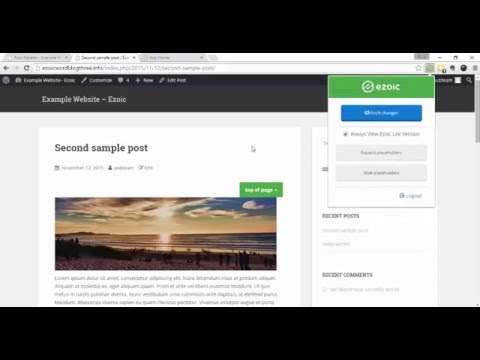
A “success message” will be shown like this:
 Set Up Ad Testing
Once you’re integrated, go back to the dashboard & click on
“Setup Ad Testing.”(If you have navigated away from the dashboard, use this direct link.)
You need to add a few lines of code between the
head tag:

If you are using WordPress, you can use the free Header & Footer WordPress plugin to add these codes.
Once you add the code, click on
“Continue to Step 2”.
Wrap Your Existing Ads Or Create New Ad Units
Pay good attention here as this one is important.
I hope you are aware that AdSense has lifted the limits of the number of AdSense ads on a page. But you still don’t want to make your page unreadable because of too many ads.
If you already have an ad, you need to wrap those ads within the code generated after clicking on “Create New Ad Units”.
This image will make it easier for you to understand the process:

Once you are done replacing all existing ad units on your site with this wrapped ad unit, it’s time to add more ad units.
With Ezoic you can run more than
3 ad units. I would suggest to keep it at 5-6 maximum so your site doesn’t look cluttered.
In my case,
I’m selecting 4.
(I will show you how to limit the number of ads in the upcoming section.)
Now, I will create a new ad unit using
Ezoic & will place it in my WordPress blog’s sidebar.
Under
“Ad Tester”, click on “+ Add Display Ad Unit”.
On the next page, select what ad unit you would like to create (refer to below image for better understanding).

Clicking on
“Create Ad” will take you to the next page where you can get the code.

Now, all you need to do is go to the
“Widget” section of your blog & paste the code into a text widget.
This is a basic step & anyone who has just started with WordPress should be able to do it.
If you are unsure, here is an image to understand the various
ad locations on a blog:

Once you have added the code in your blog’s sidebar, create more ad units & add the codes onto your blog.
Here is an official video that will help you to understand how to create & integrate Ezoic with your WordPress site:
Do ensure you go to the
“Turn On/Off” section & turn on ad types for all devices.
 Apply for Google’s Ad Exchange:
Go back to the Ezoic dashboard & you will notice one more field called
“Apply for Google’s Ad Exchange.”
Click on that, fill out a quick form, and your application will be submitted.
Now, go back to the Ezoic dashboard & you will see the following text below
“Apply for Google’s Ad Exchange”:“We are waiting for Google to review your application. This can take from 1 – 24 hours.”
Ad Testing & Placement
What Ads Does Ezoic Display?
By default, Ezoic has you sign up with the Google DoubleClick Ad Exchange.
This exchange allows thousands of ad networks to compete for your ad spots with real-time bidding.
But now you might be asking this question:
What if I’m using AdSense, Media.net, or another ad network to monetize my site; does Ezoic completely replace them?
No!
But you will need to install another app into your Ezoic account.
It’s called Mediation.
The Mediation app allows you to link your existing ads into Ezoic’s testing.

Use Mediation to link your existing ad network accounts to Ezoic.
Ad networks that are set up in Mediation will compete with Ezoic’s own ad partners for the advertising inventory on your website.
This means that your existing ads will enter the same bidding marketplace as the DoubleClick Ad Exchange.
Here is the complete list of ad networks that bid in Google’s Ad Exchange.
If your existing ads earn more revenue than the ads Ezoic is testing against, your existing ads will continue to display.
Otherwise, Ezoic will display the more profitable options.
That’s good for you because:
It ensures you’re earning as much money as possible!
The best part is that once you have done the initial configuration, everything else is automated.
How Ezoic Pays & Minimum PayoutThe minimum payout of Ezoic is $20.
You can get paid via various methods as shown in the below screenshot.

Source:
ShoutMeLoud


 Similar topics (5)
